So you’ve decided it’s finally time to remodel your kitchen! Maybe you find yourself bumping elbows with family members as you maneuver around an outdated layout. Perhaps your appliances are on their last legs after years of loyal service. Or the oak cabinets and floral wallpaper you inherited when you bought the house have long overstayed their welcome.
Whatever your reasons, remodeling your kitchen can completely transform your home. But where do you start? Tackling a major renovation project like a kitchen remodel can quickly become overwhelming. All those decisions about layout, finishes, appliances and more—it’s a lot to take in!
That’s where this comprehensive kitchen remodel checklist comes in. With all the key steps laid out in one place, you’ll have a roadmap to follow from start to finish. I’ll walk you through everything from setting your budget, to finding the right contractor, to picking finishes that reflect your personal style.
Arm yourself with this checklist and you can conquer the kitchen of your dreams! Let’s get started.
Determining Your Budget
The very first thing you need to establish is your budget. This will have the biggest impact on the scope of your project and the choices available to you. HomeAdvisor reports the average national cost for a major kitchen remodel is around $22,500. But prices can vary dramatically based on where you live, the size of your kitchen, and the quality of materials and appliances you select.
To calculate a realistic number for your specific remodel, start by measuring your existing kitchen and multiplying the square footage by the average cost per square foot in your area. According to Remodeling Magazine’s Cost vs. Value Report for 2022, you can expect to pay around $170 per square foot for an upscale remodel in the Pacific region, $135 per square foot in the South, or $185 per square foot in the Northeast.
Next, factor in the cost of any new appliances, fixtures, cabinetry and more you plan to include. Don’t forget incidental expenses like permitting fees and demolition. And pad an extra 10-15% for contingencies.
Once you have a rough estimate, think carefully about where you might be able to scale back to shave off costs. Could you refinish your existing cabinets rather than replace them? Install a laminate countertop instead of granite? Opt for a backsplash made of decorative tile rather than stone? Even seemingly small changes can yield big savings.
On the flip side, consider which elements are worth investing in for a higher-end, luxury feel. Putting your money into customized cabinetry, professional-grade appliances, or exotic countertops like quartzite can pay off when it comes to aesthetics and enjoyment of the finished space.
Defining Your Needs and Style
Now that you know what you can realistically spend, it’s time to envision the look and functionality you want for your new kitchen. Start by taking a careful inventory of how you currently use the space. What works well that you’d like to preserve? What are the pain points you’d love to fix?
Do you frequently cook elaborate five-course meals…or just reheat leftovers? Is this where the whole family gathers for homework and hang time? Will you be entertaining large groups often? Make a detailed list of how you expect to utilize the kitchen, as well as any problems you want the remodel to solve. This will inform important design decisions.
Next, it’s fun to start gathering inspiration for your ideal aesthetic! Spend some quality time browsing sites like Houzz and Pinterest, home magazines, and design blogs. Look for kitchens with layouts, color schemes, materials and styles that appeal to you. Traditional, modern, farmhouse, contemporary—which direction feels right? Tear out pages from magazines, print photos, and make an inspiration board to hone in on your vision.
Keep practicality in mind too. A Carrara marble-covered kitchen with acid-stained concrete floors may be striking—but it’s also high-maintenance and quick to show wear. Make sure to choose durable, easy-to-clean finishes that can stand up to heavy daily use.
Hiring the Right Contractor
With your budget set and vision defined, it’s time to bring in the pros. Finding the right general contractor for your kitchen remodel project is one of the most important decisions you’ll make. Start by asking trusted sources—friends, neighbors, coworkers—for referrals of remodelers they’ve used and would recommend.
Vet any contractors thoroughly before signing on the dotted line. Check reviews on sites like Yelp and Angie’s List. Ask how long they’ve been in business and how many kitchen remodels they complete in a year. You want an experienced pro who specializes in these types of projects. Request 3-5 past customer references and call them. Ask specific questions about their satisfaction level, how the contractor handled problems when they arose, and whether the job came in on time and on budget.
Interview at least three potential contractors in person and request bids. Ask to see proof of licensing, insurance paperwork, and membership in any professional associations like the National Kitchen and Bath Association. Make sure you feel 100% comfortable with their skills and reliability—this is the person who will shepherd your project from start to finish!
Establish payment terms and get every detail in writing before work begins. Reputable remodelers won’t balk at a thorough contract. Clear communication from the outset will set your job up for success.
Creating a Floor Plan
Once you’ve assembled your remodeling team, it’s time to focus on the floor plan. The layout of your kitchen has a huge impact on how well the space functions and meets your needs.
Start by taking detailed measurements of your existing kitchen, including the locations of doors, windows, plumbing fixtures and any architectural elements you plan to keep. Use graph paper or home design software to sketch a basic floorplan showing the footprint of the room.
Now comes the fun part—dreaming up your ideal layout! Figure out the optimal workflow that suits how you intend to use the kitchen. Where should the sink, stove, refrigerator and other appliances go? Do you need extra countertop prep space, an island or peninsula, or room for a table and chairs? Plan for at least 42-48 inches between counter fronts and islands or other obstacles to allow comfortable movement.
If multiple family members will be cooking at once, ensure the layout accommodates more than one cook. Maximize efficiency by grouping appliances and tools together in organized zones for food preparation, cooking, clean-up and storage. Possessing a game plan will make it much easier to place cabinetry and fixtures during the remodel.
Selecting Cabinets and Storage
The cabinetry forms the backbone of your new kitchen, setting the tone for the room’s style while providing essential storage. The first decision is whether to refinish or replace your existing cabinets. Refacing with new doors and hardware can modernize worn cabinets at a fraction of the cost of brand new cabinetry.
If replacing, semi-custom cabinets represent a solid middle ground between off-the-shelf and fully customized, with sizes, finishes and storage accessories to choose from. For a truly bespoke look or to match unusual room dimensions, custom-built cabinetry can’t be beat.
Evaluate door materials like wood, painted varieties, or glass-front for aesthetics, durability and ease of cleaning. Incorporate specialty organizing features like pull-out spice racks, lazy Susans, and integrated wastebasket bins. Pay careful attention to the interior fit-out to ensure every inch of space is optimized. A well-planned cabinet layout based on your floor plan will make your new kitchen highly functional and efficient.
Choosing Countertops
Countertops are one of the most visible elements of your kitchen. They need to stand up to heavy daily use while looking fabulous. Cost, maintenance and durability should all weigh into your decision. Here are some of the most popular options:
- Granite is a natural stone that comes in a array of colors and patterns. It offers an elegant look, but requires sealing to prevent staining. Costs vary.
- Quartz is an engineered stone that is non-porous, so no sealing required! With myriad colors and styles, it’s durable and easy to clean. $80-150 per square foot.
- Marble looks high-end but stains and etches easily. Consider just for pastry and prep areas. $40-150 per square foot.
- Butcher Block provides warmth and a classic look. Needs regular oiling to prevent drying. Around $60-$100 per square foot.
- Laminate is budget-friendly at $20-50 per square foot. Styles mimic pricier materials. Scratches and burns more easily.
Get accurate measurements and select your slabs once you have the cabinet layout in place. This helps visualize how they’ll look together. Don’t forget the edge details like distinctive carved edges.
Picking Flooring
Choosing flooring is one of the hardest parts of a kitchen remodel because options seem endless! Keep these tips in mind as you evaluate choices like tile, hardwood, laminate, and more:
- Opt for durability. With heavy foot traffic and potential water spills, kitchen floors take a beating. Porcelain tile and luxury vinyl stand up to abuse.
- Consider texture. Polished floors can become slippery when wet. Materials with some surface roughness like wood-look tile add traction.
- Style matters. But make sure performance isn’t compromised just to get a “look.” For example, hand-scraped hardwood shows scratches more than a smooth finish.
- Ease of cleaning is key. Tile resists stains, while grout needs regular scrubbing. Laminates clean up in a snap but can show dents over time.
- Comfort is crucial. Concrete or stone can be unforgiving underfoot. Floating floors help minimize fatigue during long food prep sessions.
The flooring should complement your choices in cabinetry, counters and backsplashes. Bring home samples to envision everything together.
Installing New Appliances
What good is a gorgeous new kitchen without top-notch appliances? Carefully selecting your new refrigerator, range, oven, dishwasher and more is an exciting part of the process. Consider what and how often you cook to determine the must-have features for you:
- Ranges & Cooktops: Opt for gas for responsive simmering and searing. Evaluate burner layout—do you prefer an open or closed configuration?
- Refrigerators: Measure your space and map out ideal placement. French door style offers wide access. Integrated models blend in seamlessly.
- Ventilation: A powerful range hood in a style and finish to match your kitchen decor helps keep the air fresh.
- Ovens: Added wall ovens, like double oven configurations, provide extra capacity for serious cooks.
- Small Appliances: Include spots to tuck away blenders, mixers, instant pots and more without cluttering up counter space.
Professional-grade appliances offer superior performance and durability. Buy the best you can afford. Be sure to order early—supply chain issues can mean long lead times.
Updating Lighting
The right lighting can make or break your kitchen’s functionality and ambiance. Evaluate how you use the space and when. Task lighting keeps key prep and cooking surfaces illuminated. Soft ambient fills the room. Accent lighting adds drama.
For task lighting, pendant lights or recessed fixtures above the sink, stove, island and other workstations help. Undercabinet lighting prevents shadows over countertops. Consider dimmers to control brightness for different activities.
For ambient lighting, a central fixture like a modern chandelier defines the room. Wall sconces and accent lighting like picture lights illuminate without glare.
And don’t forget the natural light! A skylight or more windows can brighten up the space. Place fixtures and electrical outlets strategically so they don’t conflict with window and door locations.
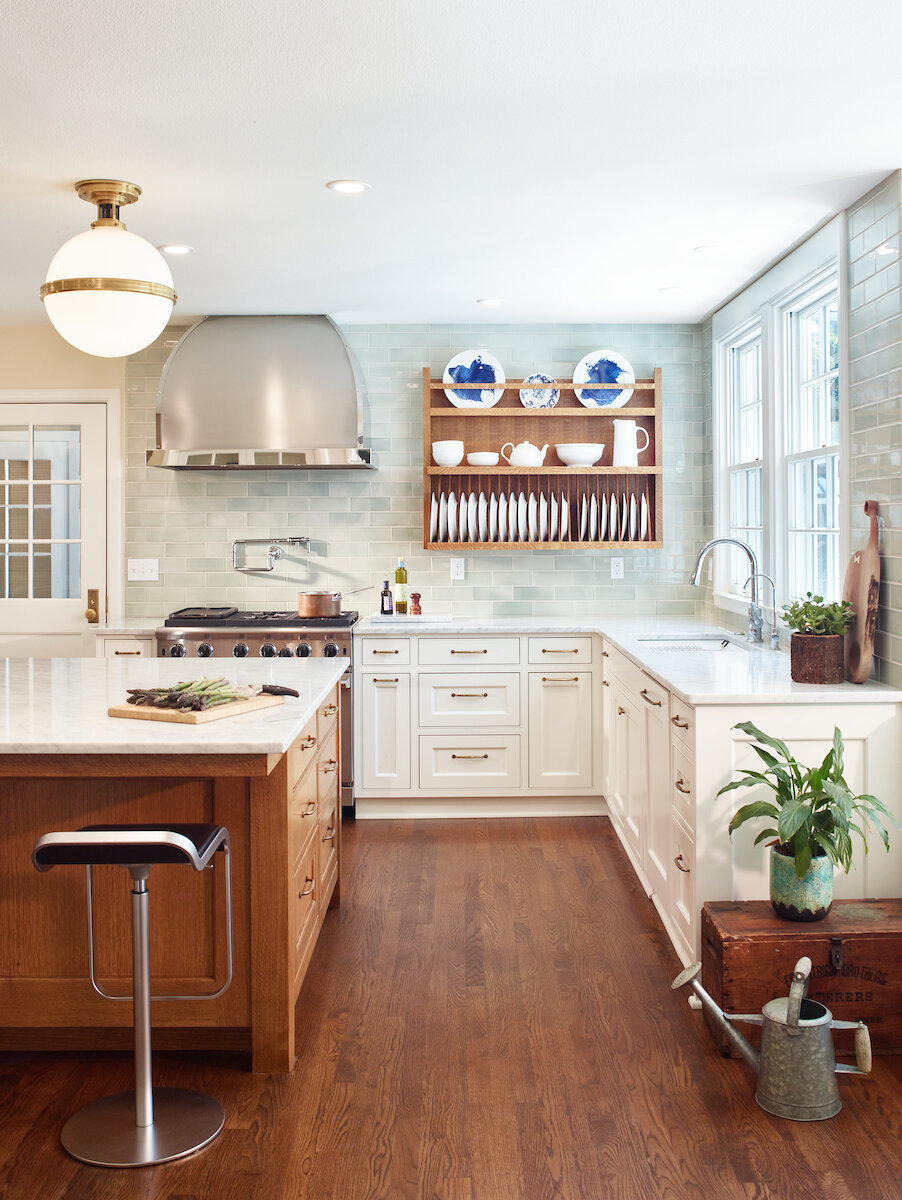
Selecting the Backsplash
The backsplash offers a prime opportunity to inject color, texture and visual interest. Often featured behind the cooktop, this relatively small area makes a lively focal point.
Handmade ceramic or glass tile allows tons of personalized options for colors, patterns and designs. Stone like marble, travertine or pebbled mosaics add natural flair. Metal backsplashes in material like stainless steel, copper or zinc introduce an industrial edge.
Consider the size of tiles or sheets of material. Larger pieces mean fewer grout lines to clean. Make sure your choice plays nicely with your cabinets, floors and countertops.
Go bold or subtle. Geometric patterns enliven contemporary spaces, while an organic leaf motif feels earthy and serene. The only limit is your imagination!
Finishing Touches
You’re in the home stretch! Now it’s time to pull together all the decorative details that give your kitchen that luxe, designer feel.
- Hardware: Swap out dull builder-basic knobs and pulls for decorative hardware with personality. Black iron, brass and glass knobs inject interest.
- Faucets: Look for professional-style fixtures, like a polished chrome gooseneck faucet mounted on the wall behind a farmhouse sink.
- Lighting: Sculptural pendants like glowing orbs or elegant drum shades become instant focal points.
- Window Treatments: Dress up windows with tailored natural linen or cotton roman shades. Valances or drapery can frame the space beautifully.
- Wall Treatments: Warm up stone or tile walls by introducing natural wood accents like open shelves or a reclaimed wood plank hood surround.
- Art: Hang a statement piece behind the stove for drama, or keep it light with a gallery wall of serving platters.
- Accessories: Tie everything together with the little touches like rugs, plants, soap dispensers, organizer trays and beyond. Have fun and showcase your personality!
How Can I Use the Kitchen Remodel Checklist for My Pop Up Camper Remodel?
If you’re looking to spruce up your pop up camper, be sure to utilize a kitchen remodel checklist for guidance. Incorporating pop up camper makeover ideas into the checklist can help ensure you create a functional and stylish space to enjoy while on the road.
Living During the Remodel
If you’ll be living in your home during the renovation, brace yourself for some major lifestyle adjustments! Setting up a temporary kitchen and eating area will make your life infinitely easier for the duration of the project.
Try to keep your existing refrigerator plugged in, even if you need to relocate it to the garage or basement. A small microwave, electric skillet, instant pot and toaster oven will allow you to cook basic meals. Use paper plates and disposable cutlery to minimize dishwashing.
Pack up any kitchen tools, serving pieces, glassware and dishes you won’t need for the next few months so they stay safe—you’ll be amazed how much dust from demolition and construction will spread! Consider arranging alternate accommodations for pets so you don’t have to worry about their food bowls and other supplies.
Understand that timelines often take longer than expected. Be prepared to improvise and dine on takeout occasionally! But just visualize that gorgeous finished kitchen waiting for you on the other side.
You’re on Your Way!
And there you have it—everything you need to know to tackle a kitchen remodel with confidence. Armed with this comprehensive checklist, you can take on one of the most exciting and rewarding home renovation projects out there.
The journey starts by setting a realistic budget and style, finding trusted pros, and mapping out an efficient floor plan tailored to your lifestyle. Select fixtures, finishes, lighting and everything else with your unique vision in mind. Before you know it, you’ll be cooking, entertaining and enjoying your dream kitchen!
Here’s to happy remodeling ahead. Your dream kitchen awaits!